


Garage Rehab
- Joseph Scaglione
- Feb 20, 2023
- 5 min read

Updated: May 1, 2023
My appreciation for a clean, organized, and well-lit work environment stemmed from my experience detailing cars and working in a body shop part time while I was in school.
I understand not everyone has a garage to work in or it may be small, but you need to take whatever space you DO have to work with and hyper organize it. Get a decent tool box, get a label maker, get ziplocks of all different sizes, get storage containers, make your space so organized that a stranger could walk in and find everything without issue. Most importantly, differentiate WORK space and STORAGE space. Work space should be clutter free, everything you need should be within an arms reach and everything you don't need for your current task should be out of sight and out of your way. Most importantly, make lighting a priority, and get retractable and hanging extension chords. You make any job 10x harder by not being able to see what you're doing, and tripping over extension chords laying on the floor. Sounds obvious right?
No, I don't have OCD, in general I'm not even an organized person. Setting up the most productive space to work on my car has been the bane of my existence for a few years now. I hate cleaning and organizing, but with my limited time available to dedicate to working on my car it is the only option.
Here's what the OG garage looked like, total of 5 incandescent light fixtures. This photo is what I would have considered clean. There is clutter, but at least the benches were cleared for a place to work. At the time I'd typically be working on the floor because I didn't want to clear a bench that was covered in clutter.

The Build -


While my car was getting the roll cage done and the garage was empty, my father wanted to install a wood burning stove. The plan was to put in the stove and add some insulation. Since being built, there had always been sections of the walls insulated and sheet rocked, but there hadn't been a good time to finish. We knew it would take more time and work clearing the garage to be able to complete the sheet rock than it took to actually do the sheet rock work. Considering both cars were out of the garage, and we were both still working from home, we decided no better time than the present to just get it done.
add welding table


We decided to split the garage into quadrants and work on one quarter at a time. That allowed us to take all the stuff out of one area and move it temporarily. Before moving to the next quadrant, we would complete the current one in full. That meant insulation, sheet rock, spackle, sanding, more sanding, and paint. This decision was made based on the obvious factor of not having to go through all of the work of clearing out sections of the garage for a second time.


We decided to go with the same paint scheme used in the trailer build. White walls with the bottom half black. I liked the look, and it was also functional because the white ceilings and upper walls were good for reflecting light, and the bottom section being black wouldn't end up looking look dirty from working. We used Behr semi-gloss outdoor paint that we picked up from the local Home Depot. To break up the white and black, I started with the white and painted to a point below where I knew the black would start, then used a laser level to lay a tape line.


The cabinets are kitchen cabinets that were being thrown out due to a house remodel. My dad picked these up a long time ago and they obviously needed to be painted black to match. We pulled the doors off and shelves out, sanding them down, and painted them with the same semi-gloss outdoor paint used on the walls. The best part of them is the knobs. Leave it to Kevin to stop by and make a joke of using some rocker arms as cabinet knob,. and leave it to me to respond "I got an extra set upstairs". I did eventually degrease the rockers and spray them with a mettalic silver paint.


I happened to see a black Friday sale on a black Husky Tool Box from Home Depot. I bought the biggest one they carried. My favorite part is the outlet strip on top of the tool box which was a perfect place to keep all of my batteries and chargers permanently. Another great feature is the soft close drawers. this stops your tools from falling over and slowly working their way to a big pile at the back of the drawer.


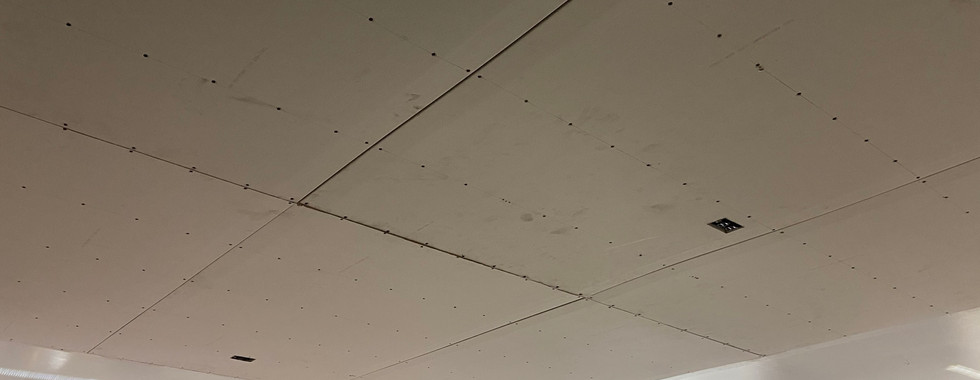
Outlets on two separate circuits were also added to ceiling. One circuit was for the lights and controlled by a light switch, and the other was for the retractable extension chords.
The lights I purchased were plugged in, and able to be plugged into each other up to 6 in a series. we put an outlet between each row and plugged one row in at a time in series. Again, these outlets were controlled by a light switch at the back door, so the hanging chains were never needed but available incase you wanted to turn off one specific light for any reason.
The second set of outlets are for the hanging extension cords. There is a 30 ft Retractable Extension Cord hanging on each side toward the back of the garage. The third is a 50 ft Retractable Extension Cord positioned at the front of the garage by the door in case I need to pull it outside. I HATE non retractable extension cords and the headache of them being lying out across the floor and not being put back properly.


For entertainment, I bought a Bluetooth Stereo System that comes complete with the main control/amplifier and two large speakers and a subwoofer. I also made a not so necessary purchase of a 60" TV with an Electric Retractable Mount that tucks the TV up flush to the ceiling. I got the fancy mount because I knew it would be blocking those shelves and figured it would be best for access to them. Of course, the TV was set up to play through the stereo as well.
Lastly, there was already an underground telephone wire ran underground to the house from years prior, so we used that as a snake to run an ethernet cord from the router in the house to the garage. With that, we added a secondary router inside the garage to ensure the signal would be strong.
Comments